Sharpening knives is a skill that improves with practice. Unfortunately, there is no one way to sharpen a knife, and you will find many different opinions when searching for answers. Sharpening knives can be done using natural or man-made whetstones, which come in various grits.
Natural stones are quarried to shape and are usually classified by their grit, which measures the coarseness or fineness of the abrasive material. This article will outline a few tips and tricks to safely and effectively sharpen your knives with a whetstone.
In This Guide
How Do I Use a Whetstone to Sharpen Knives?
Man-made whetstones are manufactured using various types of abrasive material mixed with a binder. These may be available as pre-made sticks, rods, or discs with varying grits on either side for different stages of the sharpening process.
To sharpen a knife using a whetstone, hold the knife with one hand and place the heel of your free hand on top of the stone. When you reach the end of your whetstone, flip it over to sharpen the other side. Now, pull the blade back towards yourself to sharpen the opposite side.
Whetstones are available in various grades depending on the coarseness/fineness of the abrasive material, which could range anywhere from coarse to fine stones. Whichever grade you choose should depend on how refined an edge you require.
5 Tips for Sharpening Knives with a Whetstone
When using a whetstone to sharpen knives, there are a few tips and tricks you should know. These tips will ensure you’re able to safely and effectively sharpen your knives with the appropriate whetstone. Additionally, we’ll cover some tips for whetstone cleaning and care.
Choose the Right Whetstone for Your Needs
If you are sharpening Henckel or sashimi knives, use a coarse grit stone with 400 to 500 grit. There are various whetstones on the market, such as:
- A fine India stone
- A soft Arkansas stone, and
- A hard ceramic whetstone.
If you are uncertain which one to choose, stick with the hard ceramic variety as it is abrasive enough for just about any sharpening task while still being kind on your knives.
For most other kitchen knives, start with a medium grit stone such as 800 to 1000 and progress onto finer grit stones if required. This will produce bevels and edges which cut well and don't wear down too quickly during extended use.
The finer stone sharpens much more efficiently, so you can finish off your edge on one of these instead of the rough grit if you desire. When sharpening knives with these different grades, it is best to first start with the rougher grade, as it has a stronger cutting ability when used against tougher materials.
Always Use Water When Sharpening
It's best to always sharpen knives using water; it keeps the whole process simple and safe and lubricates the whetstone, which prevents it from clogging up as fast as oil would.
The stone needs to absorb some moisture to prevent it from slipping while sharpening your knife. Start by soaking this natural or artificial whetstone in room temperature water for about 10 minutes before use.
Oil can interfere with this process and ruin the whetstone, which will lead to a loss of money and knives that aren't as sharp as they could be. Never try to sharpen knives without water; it'll only damage the whetstone. Using water can also help keep the dust down.
How Long Should You Soak a Whetstone in Water Before Using It to Sharpen Knives?
When using natural stones, it is essential to soak them in water before use to saturate stone pores. This prevents any bacteria or metal particles from being dragged into stone under pressure causing minor damage to the sharpening surface during use.
Before using, soak rough and medium grit whetstones in water for 10-15 minutes. Then, simply spritz the stone with water while sharpening it with fine stones. Fine stones can crack if left soaking in water for too long.
Using water on your whetstone when sharpening your knife helps to create lubrication which eases the process of sharpening your blade. This also helps to keep the surface of the whetstone clean. It is not recommended to use oil which can clog up the pores on your whetstone. This will prevent you from sharpening.
Using water while sharpening, soak your whetstone in a container with enough room for the stone and collect any runoff. You should only place the stone in water long enough to absorb all of the liquid so that the surface becomes moistened.
Angle the Knife Against the Whetstone
To achieve a good angle for sharpening your Henckel or sashimi knife, place its heel against the side of the stone nearest you, then raise the spine so that it's about 15-degrees or so above horizontal level also near you.
With most other kitchen knives, bring the blade edge to touch the whetstone near you, then raise your spine up so that it's an equal degree above stone level. Always take care to keep your fingers well clear of the knife blade edge when sharpening, as this is where accidents can happen.
Grasp the knife in one hand and hold the wooden part of its handle firmly. Make sure your grip is firm--not tense--and maintain a 15-degree angle between your blade and where you will begin sharpening from top to bottom.
For consistent results, it's best to use both hands when applying downward pressure on the knife. Your non-dominant hand should hold the handle while guiding the blade, and your dominant hand should apply pressure on top of the knife's spine to push it down onto the whetstone.
This is so that you can easily slide your knife across it in a slow and controlled manner, which will produce an even bevel along the whole length of the cutting edge.
Use Pressure on a Whetstone
Keep the pressure constant during all phases of the sharpening process, whether you're pushing or pulling the knife away from or towards yourself; use moderate-to-light pressure at all times.
Pushing too hard will do nothing more than wear out your whetstone faster, and applying too heavy a pressure can damage your blade or even cause injury. If you cannot feel the edge touching the whetstone with each stroke, lighten the pressure immediately! Remember to push and pull knife edge against whetstones with a consistent, gentle pressure as if cutting into the stone.
How Often Should You Sharpen Your Knife?
A dull knife requires little effort to cut but applying too much force dramatically increases the risk of injury, so keeping knives sharp is one of the most important aspects of kitchen safety.
The average knife requires sharpening once or twice a month, depending on usage. The process of restoring a damaged or dulled edge involves using a coarse abrasive such as a diamond plate, whetstone, or abrasive belt.
To maintain your knife's edge, you will need to sharpen it regularly. If you are an avid cook who uses their knives daily, professional sharpening may be required once or twice per month, depending on the type of stone used and its grit coarseness.
If your cooking is limited to special occasions, once or twice a year might suffice since the blade won't dull as quickly. However, if it's less than this - say once every two years - avoid using a whetstone at all because the knife won't have enough of an edge left for sharpening with anything but a machine that can cost ten times as much as a manual whetstone.
Using the Coarsest Side of Your Stone, Begin Sharpening
Using your dominant hand, start sharpening at one end of the blade by pushing it forward into the stone with moderate to firm pressure. Press down, but don't bear down too hard as you want to keep that 15-degree angle intact.
Be patient and let the coarse side remove some metal before moving onto the fine side of your whetstone (the finer side will polish up your knife rather than take away any metal). Repeat this process using progressively finer grits until you reach a very fine grit (at least 2000 - 6000).
Use light to moderate pressure and let the fine stones refine your blade's edge. If you're concerned about accidentally cutting into the stone, put a folded towel on top of it before continuing with each stroke.
There are two types of stones: sharpening and finishing, which differ in the way to be used. The first sharpen your blade while the other finishes it up to get that final edge. Also, remember that kitchen knives do not use stones with very high abrasive action because they would easily break the knife or, even worse, lose its thickness.
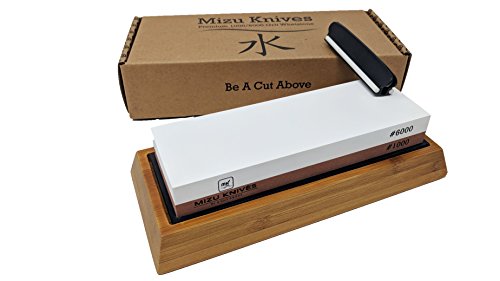
For this reason, you need whetstones intended specifically for these blades since using other stones could ruin the blades. A good product example is the Whetstone 2-in -1 Mizu Knife Sharpener. It has a coarse side (1000) and one fine (6000) made of aluminum oxide, so it is easily manageable, and in a short time, you will have a very sharp knife ready for use.
Whetstones are available with different dimensions, usually round or rectangular, so choose which is more comfortable to use without problems. Its size is generally proportional to the amount of space necessary to get the job done.
Using the Finest Side of Your Stone, Polish and Flatten the Edge
Once you’ve sharpened your knife with a coarse grit, you can move on to a finer grit. This isn’t always a requirement, but based on the type of knife you’re sharpening, moving from coarse to fine grit when sharpening can be effective. Whetstones usually come in sets with three grits:
- Coarse
- Medium, and
- Fine
A good multi-stage knife sharpener is also an excellent investment for those who want to upgrade their knives and keep them as sharp as they were when first purchased.
Using moderate pressure once again (this time on the finer side of your whetstone), pass over each edge several times until it's smooth; this shouldn't take more than 30 seconds or so per side if you've been using enough water and working at a constant angle. When an edge just won't seem to smooth out, it's time to move on to the last stage.
Fold a towel and set it on a sturdy table or benchtop. Place your stone on the towel with its non-dominant side facing upwards. Using moderate pressure, push each edge against the stone from top to bottom for about ten strokes per side. This flattens out larger chips and any fine burrs along an edge from sharpening against a whetstone with coarser grits.
When finished with either side of the knife, rinse it under hot water. You don't need to use soap unless there are still metal particles sticking around on the blade surface, which is unlikely if you've been keeping up with step 1 (lubricating). However, by rinsing off any residue, you remove any chance of rust forming on blade edges before securing it back into its sheath or block.
How to Clean Your Whetstone After Sharpening
Since we're done with our whetstones, now's a good time to clean them as well--do this by simply using a damp cloth and scrubbing any remaining metal particles from the surface.
A dirty whetstone is only going to make your life more difficult when you try to use it. A clogged and dirty stone will not cut metal effectively and quickly and can in fact damage the blade of the knife. Some tips for cleaning your whetstone after sharpening includes:
- DON'T use soap; at best, it will cut through any protective oil your stone collected during use and make the stone look dull, and at worst, it could corrode your whetstone.
- Dry your Waterstones thoroughly before putting them away.
- Either leave used water stones out to dry completely or store them in a container that allows airflow.
- Don't just put them back into their box because moisture can build up inside.
This ensures that any moisture inside evaporates and doesn't get trapped inside, which can allow microorganisms like mold to grow on your stones (and be transferred to the surface of your knives).
Whetstone Sharpening Tips
Whether you want to sharpen your knives using natural stones or man-made whetstones, it's important to take care of the stone. The grit level will dictate how often you need to take the blade back over the surface of the stone in order for a proper edge.
The grit of the stone is a measure of how coarse/fine its abrasive material is. Natural stones are quarried to shape and classified by their grit. Man-made whetstones can be made from natural or synthetic materials like silicon carbide, aluminum oxide, or emery.
Last update on 2022-08-03 / Affiliate links / Images from Amazon Product Advertising API
Leave a Reply